
How I use speedlights for wide open portraits.
To have them lit gently and with a dreamy shallow depth of field.
This article will teach you how I shoot with a single speedlight covering all the gear, techniques plus examples.
Pre-post disclaimer : this article is quite technical and suitable for photographers with a reasonable level of skill and knowledge. For others of you following my blog for the pretty pictures, there’s plenty here for you too – edit courtesy of my wife:)
Shooting speedlight portraits wide open means using your lens at it’s larger apertures. This allows the person to really pop out of the photo and give a 3D feel to the shot.
I’m a commercial photographer based in Brisbane, and I will often shoot corporate headshots this way:

Canon 5D mkII with canon 85/1.2 at f/2, 1/160 sec, iso 160

Canon 5D mkII with canon 85/1.2 at f/2.2, 1/200 sec, iso 200

Canon 5D mkII with canon 85/1.2 at f/2, 1/200 sec, iso 200
Often the accepted standard for portrait photography is to shoot at f8 so everything is in total focus. I do not agree with this. The only critical thing that really needs to be in focus are the eyes. Both of them if shooting straight on, and the eye closest to the camera if shot from the side. You must continually check this in camera whilst shooting by zooming in quickly to the eyes and making sure. Later when making selections at your computer, you can also check this at a large magnification in your photo editing software to ensure you have nailed it. See my corporate headshots for examples of this.
That’s not to say f8, all in focus photos are bad, sometimes it might even be what’s needed for a shot. It’s just not my preference and not the point of this blog post. There’s not much going on at f8, however at f2 the magic starts.
Note that the technique I’m about to describe is for shooting single head-shot or half body style portraits, and mainly indoors. Unless you can use high speed sync, there is often too much light outdoors to use wide apertures. There are other work arounds, but for now let’s keep it relatively simple.
Why the Speedlight ?
I have used speedlights throughout my professional career as a commercial photographer, and continue to do so now. I shoot Canon gear and have used the venerable 580 ex for many years. I have recently upgraded to the new canon 600 ex-rt however note that you could use any flash at all from canon, Nikon or even cheap eBay ones for this technique. The reason is that the flash is set to manual and power is adjusted manually to to light the subject. This means ETTL is not needed.

Speedlights are small, lightweight, convenient and surprisingly powerful. I take my speedlight setup wherever I go, only resorting to the heavier artillery (studio lighting gear) when I need to . For those who don’t already know, getting your lights off your camera is the 1st rule of great lighting. I often see photographers missing the opportunity to get their speedlight off-camera and create beautiful, interesting light. Note also that when shooting portraits wide open, you don’t actually need much light, so speedlights are perfect. Studio strobes are often too powerful and will over-power your shot. This can be mitigated by the use of ND gels on the lights (or ND filter on your lens) if you want to use studio strobes with this technique.
The trigger
When shooting your speedlight portraits off-camera, you must somehow trigger the flash so that it syncs with your camera.
There are many ways to do this, the best in my opinion is the wireless trigger. Wireless gives you the freedom to easily move your lights and less chance of people tripping over your gear and destroying it. Other methods are either wired sync cords or optical slaves. In fact for many years I used cheap eBay wireless triggers which worked fine. I will not go into depth describing all of the available options as you can easily find this information all over the web.
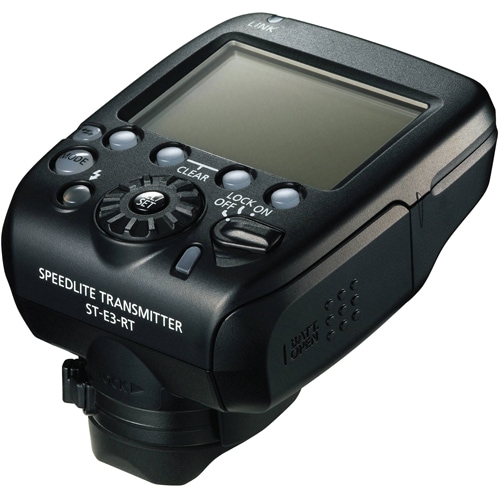
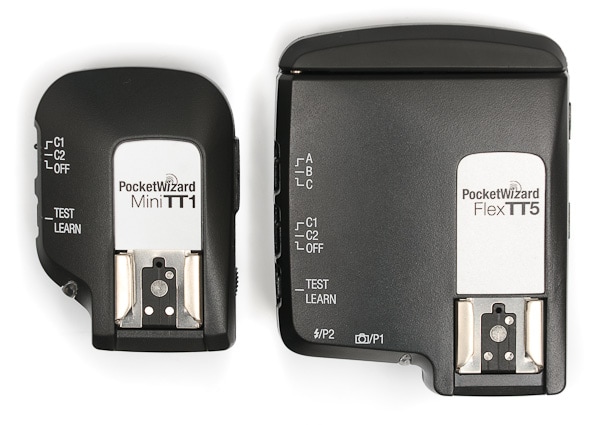
I now use Canon’s excellent ST-E3-RT since the new 600RTs have receivers built in. I find these to be the most accurate and reliable system I have ever uses to fire speedlights. They are highly recommended. For many years (and now as backup)I used pocket wizard triggers because they are reliable but also allow syncing at very high shutter speeds. Note the technique I’m describing is for syncing at normal shutter speeds, not high-speed sync. The pocket wizards I use are the mini tt1 and the flex tt5 (who names these things ?) I also use an AC3 zone controller which allows me to adjust flash power from the camera – love this feature !
Modifiers, stands and swivels
To actually get the speedlight off camera it needs to be mounted on a light stand via a swivel or umbrella bracket. These then allow the use of some sort of lighting modifier. Using a modifier will diffuse the light making it softer and more beautiful, without the harsh shadows. However using a modifier is not a deal breaker. Quite often I will not use one simply because I’m outside, have no assistant and it’s too windy. A bare speedlight off-camera is still vastly superior to one on-camera. The modifier is a bonus as it will create more flattering light for your subject.
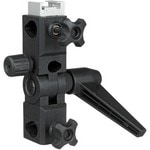
Umbrella swivel for mounting a speedlight on a light stand
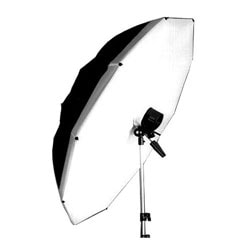
My personal favorite modifier is the Photek Softlighter II 60in. It’s a wonderfully soft light source and very easy to both transport and setup. It also happens to be the favorite modifier of one Annie Lebowitz. I also love the simple umbrella as a modifier for how cheap and convenient it is. I now also use their slightly smaller one with is 45″. It a little easier to handle in tight spaces.
I have shot many a wedding portrait with a bare strobe, off-camera set up simply out of necessity of not having my gear blown away. One of the best tips I could ever give an aspiring wedding photographer is to get your speedlight off-camera. See the examples below which demonstrate this:
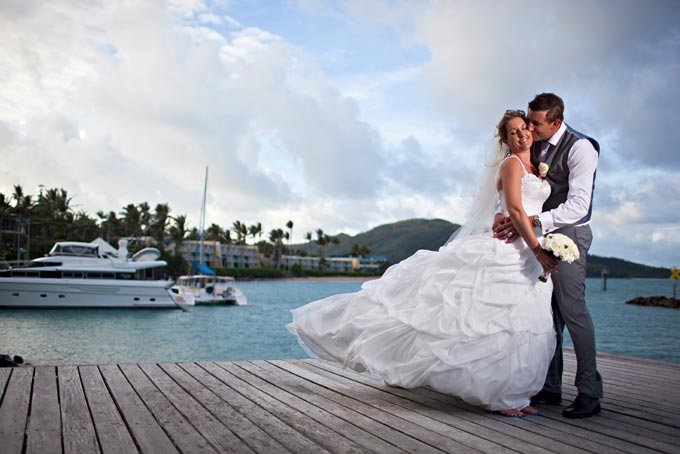
Canon 5D mkII with canon 35/1.4 at f/1.8, 1/3200 sec, iso 200. Speedlight camera right
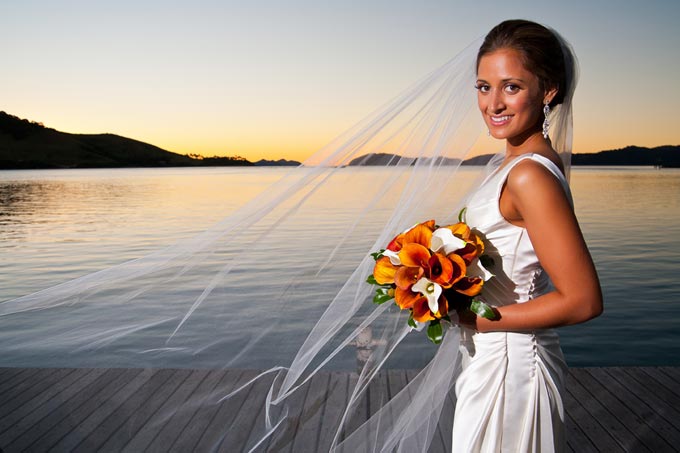
Canon 5D mkII with tamron 28-75/2.8 at f/7.1, 1/160 sec, iso 320. Speedlight camera left
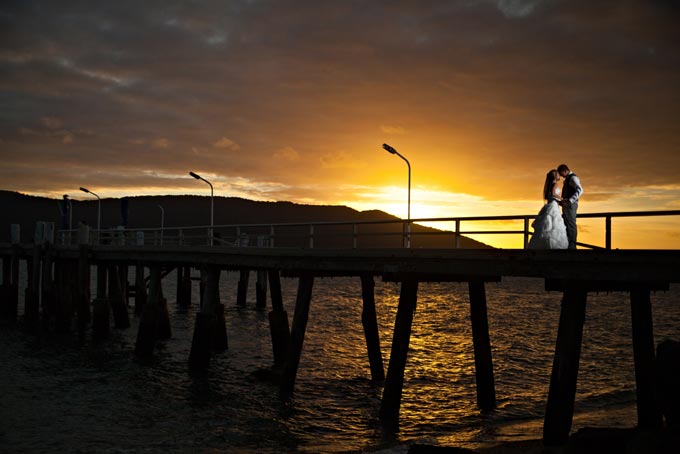
Canon 5D mkII with tamron 28-75/2.8 at f/2.8, 1/4000 sec, iso 200. Speedlight camera right
The Background
This particular technique requires a nice, well lit background. At the very least, some sort of light source in the background. The background is more about beautiful light than any particular subject matter. Remember we’re indoors therefore windows are perfect for this. A well-lit background lends itself to the dreamy look and will give you some spill light on your subject which acts as a rim or back light. Dark backgrounds don’t give you the same magic. Just look at images online and notice how many have lighter backgrounds.
Experiment with colours, shapes, window panes etc for some texture into your shot or to use as framing devices. Also don’t worry if the background blows out (is overexposed). This can really add to the lovely dreamy look of the portraits. It can be an artificially light background too – as long as you get some nice light source behind your subject:

Canon 85/1.2 at f2.2, 1/160 sec, iso 100
Notice the nice spill light on the right hand side of the subjects face
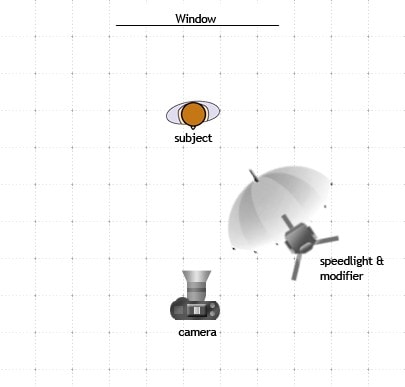
The Set-up
As you can see from the diagram below, the set up is quite simple. Experiment with your single speedlight position. More of an angle to create some dramatic shadows; over and straight onto your subject for butterfly or beauty lighting. Note that if you are lucky enough to have an assistant (or can snag a passerby) you can add a reflector on the opposite side to fill in the shadows. Again, not necessary, just a bonus. This is the fun part – play around with your light position and see what you get.
Camera & Flash Settings
In a nutshell, we are exposing for the background at our preferred aperture, then lighting the subject via the speedlight.
For any type of controlled, indoor lighting you should definitely be shooting your camera and flash in manual mode. Since the light is controlled by you, there’s no need to allow the camera to automatically change your settings. This will waste time and give you inconsistent results. Also set your flash to manual and shoot some test images to get it right.
I like to shoot an 85mm lens at around f2 or f2.2 on a canon 5D mkIII full frame camera. This is an expensive, professional lens and camera setup , however the same results can be achieved using any dslr with a cheap prime lens. Canon’s cheapest and best for this is the canon 50/1.8. It’s a great lens to try out this technique and will cost you around $100. Maybe even less second hand somewhere.
Shutter speed should be at or near to your camera’s maximum sync speed. This is the shutter speed at which the camera can sync with the speedlight. On my canon 5d it’s around 1/160 of a second. This is also fast enough to stop any motion blur. There is always a dance between your camera’s aperture, shutter speed and ISO settings to achieve the optimal exposure. For this technique, always start with your preferred aperture (around f2-2.2 ). Then achieve a balance between shutter speed and ISO that allows fast enough speed to avoid camera blur and light enough for the dreamy, well- lit background. You are exposing for the background here. There’s no substitute for experience and testing things for yourself. Check the following examples with their respective camera settings. All of these are shot using this technique:

Canon 5D mkII with canon 85/1.2 at f/1.8, 1/125 sec, iso 320

Canon 5D mkII with Canon 85/1.2 at f/2.2, 1/160 sec, iso 640

Canon 5D mkII with Canon 85/1.2 at f/2.2, 1/160 sec, iso 200

Canon 5D mkII with Canon 85/1.2 at f/1.6, 1/160 sec, iso 500
Note that I often use a tripod or monopod for this technique. It simply gets you more photos in focus, more keepers. Shooting wide open or at f2 gives a very shallow dof. Any slight movement or swaying backwards or forwards whilst shooting can affect what is in focus. Using a tripod keeps things steady and monopods are a easy to work with and don’t get in the way. I prefer tripods because they also hold up your camera when you’re not shooting.
Framing and Composition
I generally err towards tighter shots for this technique because I love faces and expressions. Since the background will be blurry and is primarily about lovely light, there is less need for the background to lend context to the image. There are no rules here – just play around to find your groove and what feels best for you. That being said, there are some basic rules of composition which can help but that’s for another post. Always remember it’s good to break the rules too.
Additional notes
Here is some additional stuff that can help, in no particular order:
- I use a canon cp-e4 battery pack. This takes 8 AA batteries and allows my speedlight to last longer but most importantly it improves the recharge time. If you’re using speedlights a lot for portraits, this is a must have item. I can’t imagine working without it.
- I often use the “focus and recompose” method when shooting these speedlight portraits. This means I focus on the eye of the subject with the center focus point of the camera, then move the camera for the best composition. Unfortunately canon’s outer focus points on the 5D mkII are simply not reliable enough and I shot this way for years. Note that the new canon 5D MKIII has much improved outer focus points. Shooting this way will result in plenty of out of focus (OOF) shots but you’ll get lots of great ones in there too. Don’t be disheartened by OOF shots – they are part of the process of this technique.
- shoot plenty of images to account for the OOF ones mentioned in the last point. If in doubt, or even if not in doubt, shoot a couple more just to be sure.
- In the interests of transparency, note that the links on this page that go to B&H photo are affiliate links. This means if you purchase anything from these I get paid a small commission. It doesn’t cost you anything more than going there yourself.
Everything I’ve talked about in this article is about the mechanics of this technique. However always remember:
Interacting with your subject and creating an experience for them is far more important that the technical side of things.
However, having the technical side mastered then allows you to get that out of the way, so you can focus on connecting with your subject for a great experience and making beautiful photographs.
I hope you’ve found this helpful and maybe even feel inspired to go out and give it a try.
Thanks 🙂
This is fantastic advice. I recently offloaded my studio lights due to moving, but now I’m in the market for a speedlight (or two!). Thanks for the excellent tips. 🙂
hey Kevin, thanks for dropping by. You can’t go wrong with Canon’s new flash and trigger system. Unless I’m really needing a studio set-up, I use them for everything…all the time. Cheers
Thanhҝs very nice blog!
Thanks for checking it out
I’ve got a geeky question: in the text you talk about using the Softlighter II, a reflective modifier. Your diagram appears to show a shoot-through umbrella. I understand both provide roughly the same kind of result. My question is – have you found one is better than the other for reducing reflections in thick glasses?
PS – a little research just confirmed that your link to B&H is the lowest cost web store for that reflector.
Hi, thanks for stopping by. Both softlighter and umbrella will result in reflections in glasses, depending upon where they are placed. Both act to diffuse the light but the softlighter just creates a more diffuse,softer and beautiful light.
The way to reduce reflections is to adjust the angle of the light in relation to where you are shooting from.
Light travels in straight lines, so positioned at a 45 degree angle, your light shouldn’t show up in the glasses. If the glasses are curved however, this can make it more difficult. It you try shooting something really curved e.g. a bottle, it’s nearly impossible to avoid the reflections. In that case it’s a matter of using them as catchlights in the shot.
Hope that helps – my suggestion is to move the light around and see what happens to the reflections. You’ll find a spot that works and still gives great light. Reflections are dependent on the light position, not the type of modifier.
cheers, Dean
I truly appreciate your work, Great post.
Thanks for stopping by and checking it out
Thank you for sharing this valuable tips! Regarding the lens, you compare a canon 85mm lens f/1.2 with a canon 50mm f/1.8.
1) Since the difference of cost is huge, I would like to know how different do you consider from each other in terms of visual results.
2) So far, I need to shoot at a fitness studio with poor light. Looking to make some portraits with multiple people and the interior has poor light. Which lens do you consider more suitable?
Hi Jennifer, thanks for stopping by. To give you an idea, I love my 85/1.2, but I rarely shoot it under f2.2. In that sense, the 50/1.8 will cover all the light gathering you need.
The 85 is better on a number of levels but it’s also 20x as expensive. The thing about prime lenses is that the cheaper ones are often very good, whereas cheap zooms are more often not that way.
1/ there is a difference in focal length. I’m a big fan of 85mm, and rarely shoot 50mm. However, if you’re using a crop sensor camera (apsc), the 50mm will give an equivalent field of view of an 85 on full frame.
I use an 85 for tighter stuff and a 35 for wider
2/ either lens will work although the 85 will gather more light. If you have a flash in this situation it is really helpful. You don’t need much, but it can help. Like I state in the article, expose for the ambient background, then add flash to light your subject.
hope that helps, feel free to ask any other questions if you have them
Thank you for sharing this information! My daughters school asked if I would be able to volunteer to do some portraits for their banquet.
I went online to check on different setups.
Thanks to you I no longer need to purchase the Profoto b2. I prefer to keep my equipment light since I travel a lot.
I’ll look into investing in another speedlight.
Any additional tips would be most welcome.
I’m taking my Nikon D610 with me with a Sigma 35 Art, 24-70 and a 70-200 with an SB-700.
Thank you again!
Glad it helped Erick. Sounds like you’re all over it. I also have that sigma 35 art – sold my canon 35L because it was better. Regarding other tips – just shoot heaps and try things. More importantly than gear however, is your connection to your subject. Work on this, connect with then, open up to them , so they will open to you. Make the experience enjoyable and fun. If you do this, your photos will shine, regardless of how you light them. Cheers.
Thanks for sharing the tips and the amazing examples. I am interested to find out if you ever use HSS to wash out the background? I have been taking pictures of special needs kids lately, and having trouble with my composition. I have been carrying around the flash, and it does a pretty good job of overpowering the background, but I can only get “arm’s length” separation from the camera, and the shadows can be really harsh.
When you use high speed sync HSS, it drastically reduces the power of your flash. If you then have that flash inside a modifier, it will kill it even more. I only use hss when outside and as a compliment to the shot. you will never overpower or anything like that.
you can definitely wash out the backgound though. Just set your exposure to do this, then add your flash in as necessary. Hope that helps.
Hi! Many thanks 🙂 Love your blog!.
Thanks for stopping by and checking it out
Нi are using WordPress fⲟr your blog platform? I’m new to the blog world
but I’m trying to get started and set up my own. Do you need any coding expertise to mɑke
your own blog? Any helⲣ woսld be really аppreciated!
yes I use wordpress and it does take a bit of time to get familiar with it. no coding needed but it can get a little complicated on the backend when you’re first starting. I’d recommend finding someone who knows what they are doing and can help you through the process- at least in the beginning as you find your feet with it.
Great post and lots of good info. I’ve been recently asked to do headshots for a local real estate team and I’ll be using this info to help set up my speedlights and hopefully nail the shoot! Thanks!
Great to hear – shoot through a link once you have them showing somewhere. Good luck with it.